


I participated in an Influencer Activation on behalf of Mom Central Consulting for State Farm. I received a promotional item to thank me for participating.What is State Farm Neighborhood Assist?Communities across the United States and Canada answered the call from State Farm to … [Read more...]
Discovering One Creative Cookie

Details ... One Creative Cookie has gorgeous custom sugar cookies, as delicious as they are beautiful, handmade-to-order with fresh ingredients. Exquisite attention to detail and excellent customer service. Our sugar cookies are an indulgent 1/2" thick and the majority … [Read more...]
Trick-or-Treat or Trick-or-Trunk?

Halloween is coming up very soon. Where I grew up, you had about 10 steps between houses and the streets were littered with kids just jonesing for that next candy hit. Pillowcases, plastic pumpkins, and pails overflowing with sweets. We dressed up as everything from Army men … [Read more...]
Disney On Ice: Princesses & Heroes
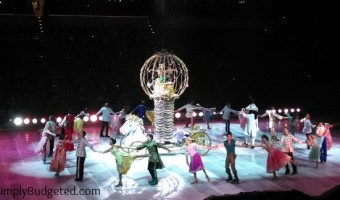
Thanks to Feld Entertainment for making this post about Disney On Ice: Princesses & Heroes possible. We received tickets to this show in exchange for a review. All thoughts and opinions are my own. Disney On Ice is at it again and visiting Charlottesville, VA through … [Read more...]
Strawberry Picking

After putting out more flags at Veteran graves on Memorial Day morning, we took the kids strawberry picking. The farm we love in Orange, VA wasn't picking so we had to find another location. We headed to Critzler Family Farm in Afton, VA. It was a drive from where we live but it … [Read more...]
More March Snow in Virginia
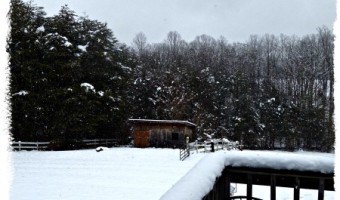
We had more snow Sunday night into Monday. It is mostly gone now. You can still see it high up in the mountains which is beautiful. One day I will have the opportunity to get pictures of the views we see daily around here. Until then, you are stuck with views of our yard ... … [Read more...]
A Virginia Snow Day – January 2013
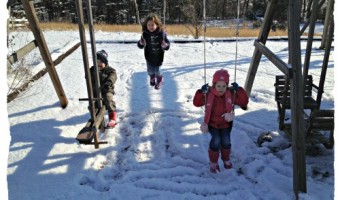
All of the kids didn't have school today ... we actually had snow this was a big fun Snow Day! We had between 2-3 inches of snow ... and yes that is enough to cancel school here! This didn't do much good for Brian's to-do list. I decided to not chance the still snow covered … [Read more...]
Pumpkin Patch Visit 2012: Miller Farms Market
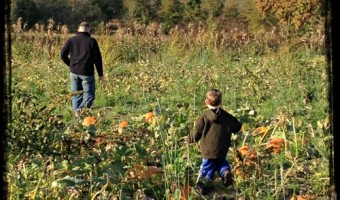
We took time earlier this month to visit our favorite pumpkin patch here in Central Virginia. We headed to Miller Farms Market in Orange, VA. It is a drive for us but they only charge you for your pumpkins. A lot places around here charge admission fees and even hayride fees. … [Read more...]
Fall in Virginia

Fall is here! It became obvious last week that Fall arrived here in Virginia. I love the colors Fall brings us here in Virginia. Taken at Miller Farms Market, Mine Run, VA Taken in my garden ... this mum is bigger than me. I need to re-home it to another spot in our … [Read more...]
Friday Favorites: A School Bus Wait Memory
This isn't a typical Friday Favorite but I hope you can play along ... Grace rides the school bus. Sophie and Matthew love to wait for the bus with Grace. This morning I was coming up the driveway from dropping off the last of the trash at the street and Sophie says "look mom! … [Read more...]
Update to the Missing Newspaper Saga

Last week, I finally posted about "The Saga of the Newspaper Subscription that Isn't Delivered." Well I have an update! Shortly after that was published, we received a phone call asking about our problem. This was slightly humorous since the "problem" was documented with all … [Read more...]
The Saga of Newspaper Subscription That Isn’t Delivered
Please see the update to this post published on August 23, 2012! Back in May (May 14, 2012 is when our card was charged to be exact), I decided to be genius is and subscribe to the local newspaper. When I say local paper, it is a small town newspaper ... publication is … [Read more...]
Wordless Wednesday: The Fair
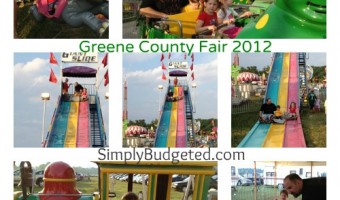
We went to the county fair last week and the kids actually got into riding rides this year. It just about broke our wallet but they had a lot of fun. Next year, I will buy the ride arm bands in advance! We hope you are having a great summer where you … [Read more...]
Wordless Wednesday: Derecho
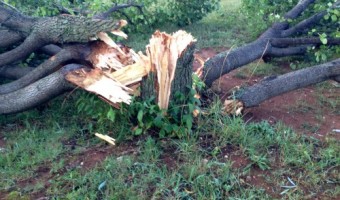
I know this is wordless Wednesday but if you don't live on the East Coast you probably didn't hear this word in the past five days. A dercho is a widespread and long-lived, straight-line windstorm that is associated with a fast-moving band of severe thunderstorms. Generally, … [Read more...]
Do you have Peppa Pig fan at your house?
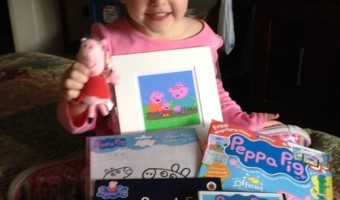
First, do you live near Charlottesville, VA? If you do, you can get a free ticket to see Sid the Science Kid at the Carmike during the Saturday morning shows! Find details here! Don't live near Charlottesville? Don't fret! You can find a local theater near you … [Read more...]