


Brian ran the Mud Warrior race last Saturday. Let us know where your Wordless Wednesday post is ... Would you ever run the Mud Warrior and get that muddy? Leave us a comment and let us know! … [Read more...]
Wordless Wednesday: Fall in Virginia
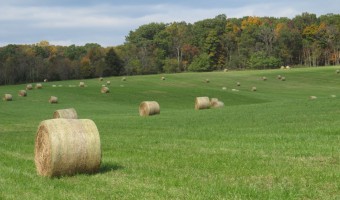
I had the chance to join Grace on her field trip a few weeks ago. Part of the field trip was a hayride around the host farm. We are so fortunate to live in an area where there are still family farms and at the base of the Blue Ridge Mountains here in Virginia. These pictures were … [Read more...]
Great Harvest Bread Company
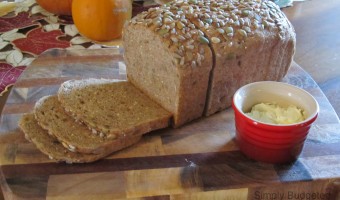
Details ... (Taken from GreatHarvest.com) It all began back in the 1970s. Our founders, Pete and Laura Wakeman, were just a couple of college kids who baked amazing scratch-made whole grain bread to help pay their tuition at Cornell University. Newly married in 1975, the … [Read more...]
Wordless Wednesday: Applesauce
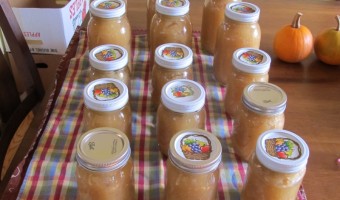
Just a little bit ... OK, a lot of applesauce. Approximately two and half gallons of homemade applesauce was canned at our house on Sunday. This is what happens when you live in an area with so many apple orchards and you come home with a bushel of apples. (Not pictured are the 5 … [Read more...]
Two Cents Tuesday: Freezing Corn
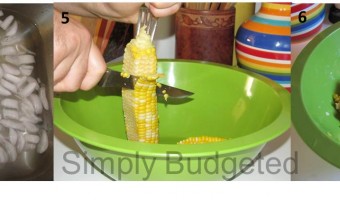
It's corn season! MMMMMM! I love fresh corn. Unfortunately, it all comes out at the same time. Who wouldn't like to have that fresh corn taste all year long? Well, it's really not that hard. We have been freezing that fresh summer corn for years. It takes a little bit of … [Read more...]
Two Cents Tuesday: Saving Seeds
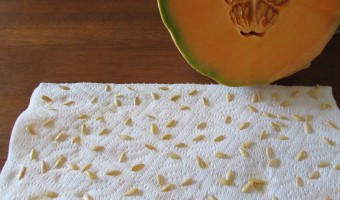
Do you have plans to plant a garden next Spring? You can start thinking about that now! If you get a fruit or vegetable you love, you can save the seeds and plant them next year. Saving seeds can be a big budget saver as seed packets can be $1-5 depending on the variety and brand … [Read more...]
Friday Favorite: Chocolate Zucchini Cake
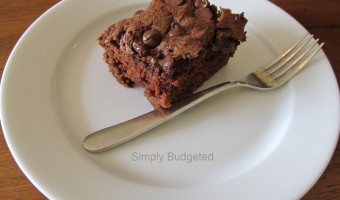
Friday Favorites is another almost weekly feature here at Simply Budgeted. The whole point of this feature is to share some of our favorite finds. Anything is game. Food. Cleaning supplies. Kid stuff. Garden favorites. Recipes. Anything that I really like and want to randomly … [Read more...]
Friday Favorites: Cville Saver

Friday Favorites is another almost weekly feature here at Simply Budgeted. The whole point of this feature is to share some of our favorite finds. Anything is game. Food. Cleaning supplies. Kid stuff. Garden favorites. Recipes. Anything that I really like and want to randomly … [Read more...]
Meatless Monday: Zucchini Parmigiana

We had such a great response to our Zucchini Tacos last week (if you missed it, find it here) that we decided to go all in and offer up another recipe this week so that you all can use up those mountains of zucchini. We get ours from our local CSA at Liberty Mills Farm. In … [Read more...]
Peach and Blackberry Cobbler
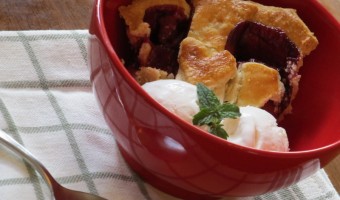
It's that time of year when fresh peaches and berries are abundant. You can find them in your supermarket or at your local farm or farmer's market. We got ours from Grelen Nursery in Somerset, VA (a farm about 30 minutes from us) and made this beautiful cobbler that we just had … [Read more...]
Cirque du Soleil – Alegria
So I have this new love ... it is Cirque du Soleil shows. It is true. Once you see one, you have to see more. No choice. You long to see the others. So when I heard Cirque du Soleil was coming to town with Alegria, I had to go. It wasn't as easy as it wasn't just me and my mom in … [Read more...]
Fundraising for UVA Children’s Hospital
I am not a big fundraiser person. I believe that you give when and where can give. I don't appreciate phone calls, door-to-door sheets, or people just walking up to you. If I could give to every organization that asked, I could but I can't. So if you skip this post, I don't blame … [Read more...]
Tax Free Weekend in Virginia!
I didn't get this posted yesterday so I am a tad late here. The Tax Free Weekend in Virginia started yesterday (Aug 7) and goes through Aug 9th! Pulled from the Virginia Department of Taxation Website: What's Exempt: During this three-day period, purchases of qualifying … [Read more...]