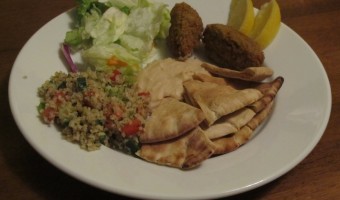
Meatless Monday: Middle East Feast

Today’s Meatless Monday was a clean out the cupboard meal. We had some Middle East mixes in the cupboard so they became tonight’s feast. We had the Manischewitz Falafel and Hummus mixes and a Near East Taboule.

My father visited the Middle East several times when I was growing up and introduced us to the lovely, simply cuisine of the region.  I have been to Israel a few times and to Iraq with the Army.  Sampling the local food only fueled my love of it.  When I introduced it to my wife, she didn’t really know what to think, but she has grown to appreciate and even seeks out this kind of food from time to time.  Now we are busy introducing this cuisine to our children.

Tonight’s plate has elements that are colorful, crispy, and creamy.  The taboulleh salad has fresh tomatoes, cucumbers, and bell peppers added after chilling the prepared box mix.  Store bought pita were cut into eighths and baked at 350 for 15-20 minutes to make crunchy chips for the hummus.  A couple of squeezes of lemon really brighten up the hummus and falafel, making them feel a little more like home made.  The salad with just a couple of drips of lemon rounds out the plate and adds a little color while upping the veggie ante a bit.

This is a full plate and shows that Meatless Monday doesn’t have to be complicated or super expensive.  The whole plate took about 30 minutes of active prep time.  Prepare everything the night before and dinner can be on the table in about 15 minutes!

Have any favorite Middle Eastern dishes?  How about a super simple meatless plate?  Leave us a comment and let us know!

Two Cents Tuesday: Muffin Tin Sorter and Server
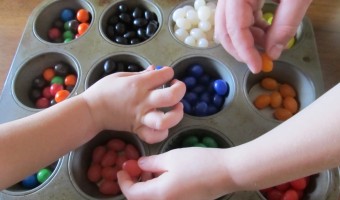
Why I am writing the Two Cent Tuesday? I need to stop having ideas and having Brian tell me it is my idea so it is my post! Here it goes Two Cent Tuesday … a Beth version.

Every need a bunch of little bowls in the kitchen and not have enough. Yeah, that was me a couple of weeks ago when I was trying to get Grace’s Rainbow Cake done. I need to sort the jelly beans by color. I knew I had like 6 or 8 glass bowls but I also have SIX little hands in the house that grab stuff from the table as they desire. I dashed around the kitchen for an instant and remembered the muffin tin that I just saw when I put the cool rack away under the stove. 12 little cups … more than I needed. I then delegated … umm, asked nicely who was willing to help me sort colors. My 5 and 3.5 year old were ALL over this. Matthew even was trying his best little two year old effort of matching colors. In no time flat, I had jelly beans sorted …

I made the cake and left the muffin tin on the table. The next thing I knew the parents were asking if they could eat them. Sure. So I went and grabbed a bag of pretzel M&Ms and added to the empty spaces.


The muffin tin was just about cleaned out (minus the black!) at the end of the party from all of the hands grabbing the candy that I had to restock for the pictures … and then the hands were at it again.

Now my muffin tins are well abused … and loved. They show that I use them! So no pretty display but you know what, no one cared. They were thrilled to pick out their favorite color and not dig through plus the kids had so much fun color matching!

A cake post is to come but here was the Rainbow Cake that I needed the jelly beans sorted for …

What have you used your muffin tin for? I know people use them for kid’s lunches sometimes but there have to be some other ideas out there. Leave me a comment and let me know!

Two Cents Tuesday: Saving Seeds

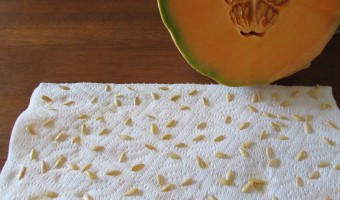
Do you have plans to plant a garden next Spring? You can start thinking about that now! If you get a fruit or vegetable you love, you can save the seeds and plant them next year. Saving seeds can be a big budget saver as seed packets can be $1-5 depending on the variety and brand of the seeds.

We had a really nice cantaloupe from our CSA (Community Supported Agriculture), Liberty Mills Farm, last week. Beth decided to save some of the seeds. She washed them off to get the inside pulp of the fruit off them. You want to wash them off because they will rot if they have the fruit still on them. Then just lay them out on a paper towel to dry. Generally you just need to leave them out a day or so. If you do this with bigger seeds such as pumpkin seeds, they will take longer to dry.  Once they are dry, we put them in a ziploc sandwich bag and write what they are, where the seeds were from, and the date. We store seeds we keep like this in the freezer so they don’t get funky. They aren’t processed like the seeds you buy at the store so the freezer keeps them good for the Spring.

Do you keep seeds to plant for next year? If so, what process do you use to store them?


Two Cents Tuesday: Seasoning Blend
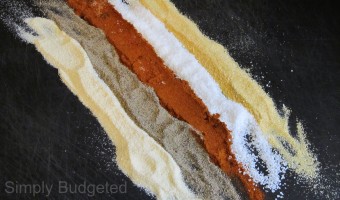
We all do it.  You’re looking for something to give our food that little something extra.  So, you start looking in the spice aisle.  There is just so much to choose from that it can be pretty overwhelming.  Then you see it…there towards the bottom…in that fancy packaging with bright colors, some chef’s face, or some words so fancy that you just know that it has to be good.  Then, you look at the price and cringe just a little before reaching for it anyway.

Sound familiar?  If so, I’m here to offer up a quick, easy alternative to those seasoning blends that will give your food that extra something special using stuff that you probably already have in your spice cabinet.

Spice Mix

Easy Seasoning Blend

This seasoning blend is very flexible.  If you just need a little, use a teaspoon as your “part”.  If you need a lot, use more.  I can easily make it through a week using a tablespoon as my “part”.  If it has too much of any one thing for you, cut back on that one thing.  The blend also works well as a base for other blends.  If you are going Italian, add one part dried Italian herbs.  If you are doing barbecue, add one part brown sugar and a half part cayenne.

Ingredients

1 part kosher salt
1 part black pepper
1 part garlic powder
1 part onion powder
1 part sweet paprika

Directions

Combine ingredients and stir well.  Store in a small mason jar or zip top bag.

I hope you enjoy this simple, cheap, and tasty tip.  Let us know what else you add to this base to up the flavor ante in your home.

Two Cents Tuesday: Meat Tenderizer

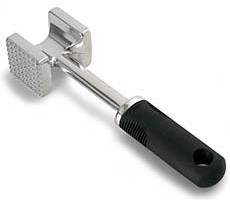
Some days are pretty tough.  The kids might make huge messes; laundry may have piled up; doctor’s appointments; dance classes….you name it.  On those days, I find it difficult to want to cook much of anything.  However, I still want to be able to put something healthy onto the table for the family.  On those nights, I use this quick tip:

Put your chicken, steak, or whatever into a plastic zip-top bag.  Take a meat tenderizer and pound it into nice thin pieces (using the flat, not the bumpy side).  If you don’t have a meat tenderizer, use a rolling pin, sautee pan…really anything heavy.  What this does is cut your cooking time waaaaay down.  You can cook at a higher heat, meaning faster cooking (about 2-3 minutes per side).  A whole boneless, skinless chicken breast will need at least 5-6 minutes per side (mine usually take closer to 10 minutes per side to get done all the way through).  Serve next to some rice and veggies or on a sandwich roll with lettuce, tomato, pickle, and a little mayo for a quick easy dinner that the entire family will enjoy.


How can you use this tip?  Share your results and photos with us.