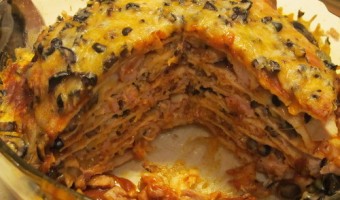
Turkey Leftovers: Pot Pie and Enchilasagna

Some people do ham for Christmas, but I’ve always fancied turkey.  Just like with Thanksgiving, though, you always have the problem of what to do with all of the leftover turkey.  You want to use up the turkey, but turkey dinners, turkey sandwiches, and turkey salad can only get you so far.  Here are my simple offerings for cheap, easy ways to completely transform that turkey into a new dish that the entire family will enjoy.  Both of these recipes use 5 ingredients (not counting salt, pepper, and water).  Odds are that you have everything you need to toss together one of these dishes tonight!


Turkey Pot Pie

This really couldn’t be simpler.  I used 2 packages of powdered gravy mix and a bag of frozen soup mix (potatoes, carrots, peas, etc).  I prefer the brown gravy, but leftover turkey or chicken gravy works, too.  If you don’t have a pie crust, use a can of biscuits or a batch of baking mix to cover the gravy mix.  The best part has got to be the crust soaking up all of that gravy.  So cheap, but soooo tasty!

Ingredients

2 cups brown gravy, prepared
1-16 oz bag mixed frozen vegetables
2 cups chopped leftover turkey
salt and pepper to taste
1 pre-made refrigerated pie crust
1 egg
1 Tbsp water

Directions

Preheat oven to 350.

Mix first 4 ingredients in a medium pot over medium heat and warm through for 5-10 minutes.  Pour into a greased, 9-inch, deep dish pie plate.  Cover the dish with the crust and fold the edges in.  Beat the egg with the water and brush over the crust

Bake at 350 for 35 minutes.  Allow to cool for 5-10 minutes before serving.


Turkey Enchilasagna

I wanted to make enchiladas, but it had been a long day and rolling everything up seemed like so much work.  We also didn’t have any enchilada sauce, but we always have tomato sauce and spices so I whipped some up using this easy Ten Minute Enchilada Sauce Recipe.  Layering a flat starch product with tomato sauce, meat, and cheese seemed too much like lasagna not to go with the corny little play on words.  Serving it up was actually much easier than enchiladas that I’ve made in the past, so this might start becoming a regular thing around here.

Ingredients

2 cups of Mexican Blend Shredded Cheese
1 6-oz can black olives, chopped
1 can enchilada sauce
8 tortillas
2 cups chopped turkey

Directions

Preheat oven to 350.

Combine cheese and olives in a large bowl.

Spoon 2-3 tablespoons of sauce into the bottom of a round casserole.  Layer tortilla, 2-3 tablespoons of sauce, 3-4 tablespoons of turkey, and 3-4 tablespoons of cheese mixture.  Repeat 6 more times.  Top with tortilla, more sauce, and the remaining cheese.

Bake at 350 for 30 minutes.  Let cool for 5-10 minutes before slicing and serving with sour cream.

I hope you enjoy these dishes.  I know that I enjoyed making them and that my family loved eating them!  Leave us a comment and let us know what you do with your holiday leftovers.

KIA Sorento Review and Inspired Recipe: Orange and Ginger Cranberry Sauce

We recently had the opportunity to drive the 2012 KIA Sorento for a week. The kids were thrilled to have something new in the driveway even if Little Dude insisted it was a van. The Dark Cherry color of the Kia Sorento that we drove is almost identical to the color of our mini-van so that is why he kept saying that!

Here is a few “Did you knows?” about the Kia Sorento …

  • The Kia Sorento was Korean born but is manufactured in America at Kia’s U.S. facility in West Point, Georgia.
  • Kelly Blue Book recognized Kia as the brand with the lowest total cost of ownership for 2011.
  • The luxuriously appointed interior of the Kia Sorento easily accommodates seven passengers.

 What did we love? Well here it is a picture gallery … (click the picture to see the full size version)

The Kia Sorento has a push button start. This was really odd at first as we didn’t know where to put the key but after you realize the Kia fusses at you if try to leave the key in it or won’t let you lock the key in there, you feel better about using the key and push button start!

The Sirius radio control panel is a touch screen. Beth loved the touch screen as the one in our van isn’t a touch screen. It was so easy to use. While on the topic of the radio, you can change the channel on the radio from your steering wheel so no hands off the wheel to change channels when that Christmas song is annoying you! Just move to one of the other two Sirius Christmas stations!!

Now the cup holders. Cup holders are a big deal for us. Between us and the kids, the cup holders get some major use. The ones in the center console  were a great size and fit everything we tried to put in them. You can also see that you can use the  feature where you shift gears in Drive  on the center console. Seeing how we don’t drive manuals around here, we didn’t really test that out but I know my dad would love a feature like that!

All of these features are great, but the best part of the KIA Sorento is that there is enough room for seven people!  You can see the third row seat in that one picture. You do lose just about all of your trunk space but if you are hauling people and not stuff then you set. For us, we have to have a second vehicle that can hold our whole family of five as our back up plan. This is hard to find … especially when three of the five are in car seats! There is no problem fitting all of the kids in here if needed which would make this a great second vehicle for us.

I actually had someone comment on the color of the KIA while I was in the drive-thru.  The lady loved the color and asked the name.  I didn’t rightly know, but I guessed that it was some kind of a cherry or cranberry.  It being right after Thanksgiving, that got me thinking about the cranberry sauce that I make for the holidays each year.  The color is a pretty close match to the vehicle and the orange and ginger give that little touch of class and sass that I think the KIA possesses.


Orange and Ginger Cranberry Sauce

Usually, I have the time to make my cranberries from scratch.  Unfortunately, that doesn’t always happen.  This is my very close approximation.  It’s simple, tasty, and very budget friendly.  Enjoy!

Ingredients

1 can whole berry cranberry sauce (not the jellied kind)
1 Tbsp orange zest
1 Tbsp orange juice
1 tsp fresh ginger, grated

Directions

Combine all ingredients in a small saucepan.  Heat through until thickened slightly.  Chill completely in the refrigerator.

What are your thoughts on the 2012 Kia Sorento? Do you feel inspired by the color to try the Orange and Ginger Cranberry Sauce? Leave us a comment and let us know!

NOTE: We were provide the opportunity to test drive the vehicle in support of this review and recipe idea.  All thoughts and opinions expressed in this review are our honest opinion.

Meatless Monday: Red Beans and Rice

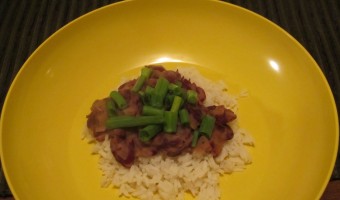
Our family love rice.  With few exceptions, if you place a dish with rice in front of my kids, they will eat it.  I love red beans and rice in particular because, growing up in Louisiana, the dish was kind of a staple of my youth.  Many recipes add meat (ham hocks, sausage, etc.) but I’m not sure that this is completely necessary to make a successful red beans and rice.  I put together a version a couple of months ago that used a meat substitute (take a look here), but this time, I want to go completely meatless (no cheating).  This version takes simple ingredients and converts them into a thick, rich dish that, when poured over rice, makes a rich hearty meal.


Red Beans and Rice

This is a small batch recipe.  It’s just enough to top a small bowl of rice for myself, my wife, and our three little ones with no leftovers.  If you need more, you can pretty easily double or triple this recipe.  You can definitely make this ahead of time and reheat it during the weeknights.

Ingredients

2 T olive oil
1/2 medium onion, diced
1 garlic clove, diced
1/2 t salt
1/2 t black pepper
1 t cumin
1 t Italian seasoning
1 15 oz can red kidney beans, rinsed and drained
3/4 C water
prepared white rice
chopped green onions (optional)

Directions

Heat oil in medium pot over medium-high heat.  Add onion and cook until translucent, 5-7 minutes.  Add garlic and cook for another minute.  Add salt, pepper, cumin, and Italian seasoning.  Cook another 2-3 minutes.  Add beans and cook for 1 minute.  Add water and bring to a boil.  Reduce heat to low and simmer for 15 minutes, stirring occasionally.

Uncover beans and smash about half of the beans against the side of the pot.  Stir well and recover.  Continue simmering for another 15 minutes, stirring occasionally.  Serve over prepared rice and top with green onions.  Enjoy!

We hope you enjoy our simple offering on Meatless Monday.  Leave us a comment if you enjoy it or let us know what you are having tonight.  If you are interested in Meatless Monday and want to get some more information about joining in the movement at your home, check out this site or send us an email.

Meatless Monday: Middle East Feast
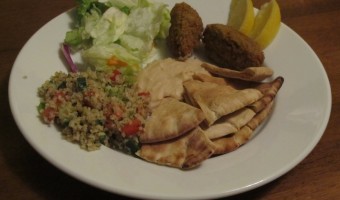
Today’s Meatless Monday was a clean out the cupboard meal. We had some Middle East mixes in the cupboard so they became tonight’s feast. We had the Manischewitz Falafel and Hummus mixes and a Near East Taboule.

My father visited the Middle East several times when I was growing up and introduced us to the lovely, simply cuisine of the region.  I have been to Israel a few times and to Iraq with the Army.  Sampling the local food only fueled my love of it.  When I introduced it to my wife, she didn’t really know what to think, but she has grown to appreciate and even seeks out this kind of food from time to time.  Now we are busy introducing this cuisine to our children.

Tonight’s plate has elements that are colorful, crispy, and creamy.  The taboulleh salad has fresh tomatoes, cucumbers, and bell peppers added after chilling the prepared box mix.  Store bought pita were cut into eighths and baked at 350 for 15-20 minutes to make crunchy chips for the hummus.  A couple of squeezes of lemon really brighten up the hummus and falafel, making them feel a little more like home made.  The salad with just a couple of drips of lemon rounds out the plate and adds a little color while upping the veggie ante a bit.

This is a full plate and shows that Meatless Monday doesn’t have to be complicated or super expensive.  The whole plate took about 30 minutes of active prep time.  Prepare everything the night before and dinner can be on the table in about 15 minutes!

Have any favorite Middle Eastern dishes?  How about a super simple meatless plate?  Leave us a comment and let us know!

Meatless Monday: Lubia (Stewed Green Beans)

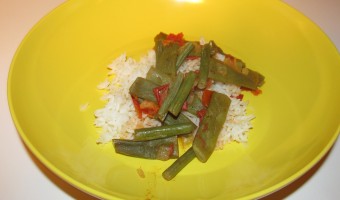
Alright, this is a day late here, but I can hardly be held accountable.  Beth took the camera to work with her yesterday and she had to work late!  So I didn’t get a picture until it was too late to really post.  Dealing with a new dish, three kids, and no camera, I’m happy to have a post up at all at this point.

When Beth and I were up in Philadelphia this weekend, we picked up dinner at Reading Terminal Market (really, if you are ever in Philly, this is a “must go”).  We looked around for a bit and finally settled on a little Middle Eastern stall.  I’m a sucker for shawerma (similar to a gyro) so I got that.  Beth got a chicken kabob platter that had several sides.  One of the sides was a tasty little green bean dish served over rice.  It had this very light tomato sauce with it that really did the dish justice.  After doing a little research, I found out that this simple dish is called lubia (or lubya, or loubia, or lubio, etc).  Basically, that’s the Farsi word for green bean.  It appears to be of Persian origin, but is seems to be a pretty common comfort dish throughout the Middle East.  As with any comfort dish, you can find as many recipes for this as you can find grandmothers who make it.  Here is my humble attempt.

Lubia

This can be served over rice as a main dish (our kids ate it all up…Clean Plate Club!!) or as a side to your everyday meal.  Some recipes I saw for this even included ground meat among the dish’s ingredients.  We used a mix of green beans and Italian beans because that’s what we had around the house.  We also used fresh tomatoes because they were here.  However, a large can of tomatoes and a bag of frozen green beans would work out very well.

Ingredients

2T olive oil
1 small onion, diced
2 cloves garlic, minced
4 small tomatoes, cored, seeded, and diced
1 1/2 t salt
1 1/2 t pepper
1 1/2 t cinnamon
2 lbs fresh green beans, cleaned, stemmed, and cut into 1″ pieces
1 C water

Directions

Add olive oil to a 12″ skillet over medium-high heat.  Add onion and garlic and cook about 5 minutes until translucent and just beginning to brown.  Add tomatoes, salt, pepper, and cinnamon and stir to combine.  Add green beans, but do not stir.  Cover and reduce heat to medium-low.

Allow to cook for about 15 minutes before stirring.  Add water, cover again, and allow to cook for about 10 minutes or until green beans are tender.  Uncover and let sauce reduce for about 5 minutes.  Serve over rice.

We hope that you enjoy this rendition of a popular Middle Eastern dish.  Leave us some comments to let us know how you like it.

Two Cents Tuesday: Freezing Corn

It’s corn season!  MMMMMM!  I love fresh corn.  Unfortunately, it all comes out at the same time.  Who wouldn’t like to have that fresh corn taste all year long?  Well, it’s really not that hard.  We have been freezing that fresh summer corn for years.  It takes a little bit of work, but really not much more than you would have spent preparing the corn for dinner in the first place.

It can also save you a lot of money.  We pay to join a CSA (community-supported agriculture) every year and we get baskets full of corn anyway.  This year we are getting our corn from Liberty Mills Farm in Orange, VA.  Even at the farmer’s market or supermarket, though, it can be ridiculously cheap.  We recently saw 2-pound bags of the store brand corn selling for $3 each.  To get the same amount of fresh corn will cost you less that $2 and a little bit of your time.   The best part, in my opinion, of freezing your own corn versus buying it from the freezer section is that you get to freeze the cobs too!  Those simple cobs that we normally throw out can make the most beautiful, comforting stock for soups, chowders, or risottos that can really bring a ray of sunshine to those winter doldrums.  Saving money and getting more for the money that you are saving.  I like the sound of that!

So, without any further ado, here is our simple process for freezing that yummy summer corn for the winter.

(1) Husk the corn and remove as much of the silk as possible.  (2) Place the corn into salted, boiling water for 2-3 minutes.  Fresh corn doesn’t need to be cooked much and it’s going to be reheated out of the freezer anyhow.  (3)  Pull the corn out of the water into a bowl to transfer it.  Admire just how gorgeous the corn is!

(4) Place the corn into ice water.  This will shock it to stop the cooking, keep the beautiful color, and cool it down so that you can handle it.  (5) Using a fork in the cob to keep your hands out of the way, place the corn into a deep bowl and slice the outer edge of the kernels with a sharp knife.  You are not looking to go all of the way into the cob; you just want the sweet tasty part.  If you go too deep, though, it’s ok, it’ll still taste good.  If you do not go deep enough, it’ll just make the stock that much better!  You want a deep bowl so that the kernels don’t cover your kitchen.  If you are doing a lot of corn, you might want a deep bowl for slicing and another bigger bowl to hold it all. (6) Admire all of your hard work and resist the temptation to add butter, salt, and pepper and dig in!

(7) Transfer the corn to zip top freezer bags and weigh into the desired portions.  10 oz is usually enough for me, Beth, and our three little ones.  As they get bigger, we are going to have to start adding more.  (8) The final result is over 3 pounds of cut corn and 11 corn cobs for the beautifully golden stock.

I hope that you all enjoy our simple little tip.  It’s easy, saves money, keeps your family a little healthier.  All in all, that’s Simply Budgeted!

Meatless Monday: Pasta with Fresh Tomato and Basil Sauce

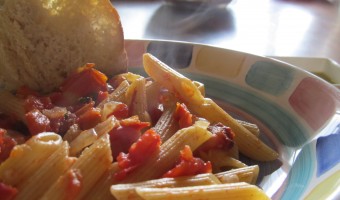
It has been a pretty long weekend around here.  It was the one weekend that we didn’t have planned to go anywhere, but those weekends always wind up busier because you have to work on all of the stuff that you weren’t able to get to on the days that you were out.  Beth had homework to catch up on, I had to plan out Sophie’s preschool plan.  We had housework, yardwork, bread making, prepping food for freezing, church, shopping, laundry.  You name it, we were on it.  On top of that, I had a lovely little 5-mile run on Saturday morning.  It has been at least 8 years since I have run that far.  I felt good doing it, but I definitely felt the effects all weekend.

Today, both Sophie and Matthew had classes and I have some work to do for the PTO for Grace’s school.  I hardly feel like eating, much less cooking.  At busy times like this, I just need a simple meal that I can throw together in a few minutes using ingredients that I keep around the house.  I want it to be healthy, but it also needs to be fast!  This is one of those meals.

Pasta with Fresh Tomato and Basil Sauce

Pasta with Fresh Tomato and Basil Sauce

While your water is coming up to heat, prepare your vegetables.  You can go to the trouble of peeling your tomatoes, but you probably won’t notice much difference.  Just slice the top off and squeeze out as much of the seeds and liquid as you can so that your sauce isn’t too juicy.  Then cut them into pieces about the size of your thumbnail.

Ingredients

1 box pasta (Grace asked for the Penne, but use whatever you have handy)
2 T olive oil
1 small onion, diced
2 cloves garlic, minced
1 lb fresh tomatoes, seeded and diced (Roma are best, but who can be picky at times like these)
salt and pepper to taste
10-15 basil leaves, thinly sliced

Directions

Prepare pasta according to package directions.

While pasta is cooking, add oil to large saute pan over medium heat.  Add onions and cook until just beginning to turn transparent, about 5 minutes.  Add garlic and cook another 2-3 minutes until garlic is very aromatic.  Add diced tomatoes, salt, and pepper.  Continue cooking to reduce down the amount of liquid.  Add the pasta directly from the cooking water and stir it around until the sauce begins to stick to the pasta just a little.  Sprinkle with the basil and serve with garlic bread (and maybe something green).

From putting the water on the stove to sitting down to eat took all of about 30 minutes.  That includes chopping everything after starting the water and having little “helpers”.  As a bonus, those picky little helpers ate really well!  I hope that you enjoy this quick, simple recipe.  Leave us a comment and tell us what you think!

Meatless Monday: Quinoa Pancakes

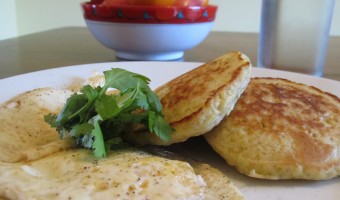
Meatless Monday is a day late this week (hey, it has been a hectic couple of weeks around this household, plus it was Labor Day!).  We are still on a bit of a quinoa kick, so we were looking for something interesting to do with it.  I came across this recipe for quinoa pancakes from Everyday Food, one of Martha Stewart’s magazines, and I just knew that I had to try it out.

The great thing about these is that they are pancakes (I mean, who doesn’t love a good pancake), but they are pancakes that are full of all of the goodness of of quinoa.  So lots of nutrients, protein, fiber, etc and the kids eat them all up.  I made some silver dollar sized ones and our three kids ate three pancakes each!  I was worried that there wouldn’t be enough for me!

Now, I love breakfast for dinner.  It was something that I grew up having from time to time and every now and then I have to get back to those roots.  It being Meatless Monday, I couldn’t start adding bacon or sausage to the meal.  So, to up the breakfast quotient a bit, I had to add a couple of eggs.  Now, before the Meatless Police gets on me here, eggs are not really a meat until Mr. Rooster comes along.  I also know that conditions at the big egg farms are deplorable.  I do know, however, that you can get fresh local eggs from very humane farmers.  If the idea of eating eggs turns you off, don’t eat them.  The pancakes will be fine all by themselves.  All of that having been said, for me, eggs are healthy, rich, and tasty and they certainly add to the pancake experience.

So, without further ado, here is the recipe reprinted from the Martha Stewart site without their permission (if you see it down all of a sudden, you’ll know that I got a “nasty-gram” from some corporate types).

Quinoa Pancakes

Quinoa Pancakes

Ingredients

1 cup cooked quinoa or brown rice
3/4 cup all-purpose flour
2 teaspoons baking powder
1/2 teaspoon coarse salt
1 large egg, plus 1 large egg white
1 tablespoon unsalted butter, melted, plus more for skillet
1/4 cup low-fat milk
2 tablespoons pure maple syrup, plus more for serving
Fresh fruit or fruit preserves (optional), for serving

Directions

In a medium bowl, whisk together quinoa, flour, baking powder, and salt. In another medium bowl, whisk together egg, egg white, butter, milk, and syrup until smooth. Add egg mixture to flour mixture and whisk to combine.

Lightly coat a large nonstick skillet or griddle with butter and heat over medium-high. Drop batter by heaping tablespoonfuls into skillet. Cook until bubbles appear on top, 2 minutes. Flip cakes and cook until golden brown on underside, 2 minutes. Wipe skillet clean and repeat with more melted butter and remaining batter (reduce heat to medium if overbrowning). Serve with maple syrup and fresh fruit or preserves if desired.

I hope you enjoy these!  I know that we did.  Tell what you use to top these.  We used syrup like we normally would for pancakes, but surely we can be a bit more interesting.  Any ideas?  Let us know!